Photobucket   Photobucket   photobucket   Photobucket   Photobucket

Monday 31 March 2014

Review: Mavala Oil Seal Dryer


I'm sure many of you agree with me when I say waiting for your nails to dry is one of the most tedious tasks out there. The worst is when you've waited an hour, desperate for the loo or to pick up that biscuit next to you, and you end up smudging it within minutes. Well, fear not, I may have found a solution!

The Mavala Oil Seal Dryer aims to dry your fingers to touch within a matter of seconds, whilst also nourishing your cuticles. Sounds a bit too good to be true right? Well I've tested it and I must see I'm very impressed.

I've not once smudged my nails since using this, and it pretty much is dry to touch in a matter of seconds. The fact that it's an oil makes it super easy to apply too. You don't need to concentrate on the application and I find it has a nice nourishing quality to it too. I'm also hoping that this will mean I'll be able to use a whole bottle without any of the glooy -ness that occurs with polishes.

I've tried both the Sally Hansen Insta-Dry and the OPI Rapid Dry and must say that I think this wins hands down. Coming in just over £10 it won't break the bank and is definitely worth each and every penny.

Have you tried this? What do you think?

Laura xoxo

Saturday 29 March 2014

How to get more Boots Points

Ah Boots points. The one thing that makes spending lots of money on items we don't really need acceptable. However it always seems that it takes forever to save them up, but only a couple of minutes to spend them. (Such is life right?)

For today's post I thought I'd share with you my top tips on how I like to collect my Boots points, and as a little thank you, I'd love it if you could share yours too, sharing is caring after all!

1) Put your card in the machine before each shop - Before you run to the isles with the new releases you're desperate to get your hands on, head to the little machine at the front of the store which will tell you what offers you can receive. Taking a quick couple of minutes to have a scroll through the machine beforehand could help you double your points or gain extra points on purchases you're already about to make.

2) Look around for offers - Not fussed by what deodorant or toothpaste you use? More often than not certain brands will have offers that will allow you to gain points through their purchase. If you're really lucky sometimes they put points on make-up items too. A great reason to try a new lipstick!

3) Save your double points voucher for big trips - There is no point using your double points voucher on a new toothbrush if you often spend a lot in Boots. Save it for a big shopping trip as you'll end up getting more in return. Whilst it's tempting to do it on your little shop to get more points, it will be more valuable to hold your horses and wait.

4) Make use of your voucher booklet - You know that amazing day when a new pack of shiny vouchers arrives on your doorstep? Look through it. Boots are kind and tailor the offers to your spending habits. Look through and see what's there and if you can use any. Keep them in your hand or by your Boots card so they're ready to use. Sometimes it's worth saving up for all the items you want so you can spend that big £50 voucher.

5) Keep your Boots card on you - I always have my card in my purse with me so that I know it'll be there to be used whenever I'm in store. It's great if you're shopping with family or friends who've forgotten theirs as they're likely to allow you to hand over yours, meaning you get points without spending. Should you spend without your card, make sure you keep the receipt so that you can claim then on another visit too.

So they're my tips, what're yours? I'd love to know.

Laura xoxo    

Friday 28 March 2014

Spring Fling: Lips


The final instalment in my Spring Fling trilogy is ending with lips. I love me some good lip products and these are what I intend to be using over the next few months.

Maybelline Colour Sensational Lipgloss in Glorious Grapefruit - This is a gorgeous lipgloss that has a hint of tint to it that means your lips look shiny with some nice colour to it, but not too OTT. It also means you can eat a good old 99 without having it smeared around your face (can't say the same for the ice cream though!)

Rimmel Appocalips in Stellar - If you want to make a statement this Spring, this is your guy. Perfectly pigmented, and fully opaque this gloss/lipstick hybrid really packs a punch on your lips. Application can be a little tricky, and it can end up on your teeth if you're not careful, but bold lip lovers, this is the one for you.

Bourjois ColourBurst in Red Sunrise - I love a good lip crayon and this Bourjois on in Red Sunrise just screams Spring to me. It's on the red side of coral which means it's great transitional colour from Winter to Spring. I used it in my Spring tutorial on Tuesday.

Rimmel Kate Lipstick in 110 - If you're looking for a coral colour that's going to stick around all day, look no further. Due to it's matte texture it stays put for a rather long time, perfect for BBQ season. The colour is the perfect colour and I love bring this out in the Spring.

L'Oreal Colour Riche Extraordinaire in Rose Melody - My favourite lip product of the moment. The same consistency as the Rimmel Appocalips, but a bit more moisturising on the lips. This nude colour is perfect all year round, but the slight orange tinge to it means it looks great with a bronze look, meaning perfect for Spring.

What are your spring lip choices?

Laura xoxo

Thursday 27 March 2014

Spring Fling: Eyes


When it comes to spring/summer I feel that bronze is the only way to go. Gold is a distant Christmas memory and I'm ready to go all bronze and goddess like (a girl can dream)! For me a bronze smokey eye is the perfect spring/summer smokey eye combo.

The Grab and Go -Ah the Rimmel Scandaleyes pencil is just so great for a quick wash of colour over the eye. The pencil application means it's easy to use and the cream texture makes it easy to blend out too.

The BaseMaybellines Colour Tattoos are still something I love to use and this one is great for creating a bronzy base that holds and intensifies colour. Of course it looks nice on its own too, which is always a bonus.

The 'keeping it simple' - MAC All That Glitters is as gold as I go for summer, but it has a bronze tint to it that makes it perfect for subtle simple eye that still says 'I'm ready for you summer'!

The Summer Shade - Sometimes products have to take a back seat until it is their time to shine in a new season, and MAC's Mulch is definitely a spring/summer item to me. It is the perfect warm bronze colour that looks great in the crease or just all over the lid.

The Liner - Ah MAC Powersurge, my love for this is still going strong, and there is no better time to use this than summer. It's perfect to bronze up the water line whilst also working well as an all over lid colour too. Oh how I love this product.

What are your spring eye products?

Laura xoxo

Wednesday 26 March 2014

Spring Fling: Cheeks


I decided I wanted to do a little spring series here on the old blog. I do love me a little series every now and again and the changing of the seasons allows the perfect opportunity. I'm going to start my series focusing on cheek products, tomorrow eyes and then Thursday will finish with cheeks.

The Bronzer - Okay, so this isn't necessarily a 'spring fling' as I love this product all year round, however everyone needs a bronze glow and there is no better product for it than this. There's a load of different intensities in the Clarins Bronzing Duo so you should find a shade that suits your skin tone perfectly. The shimmer in it is simple and subtle and can rarely be seen.

The Bronze Glow - Ah Nars South Beach is what started my multiple craze. I love this product, plus it's Millie Mackintosh approved. I love using this as a bronzer, highlighter and contour. It really is a multi use product and this is the perfect spring/summer shade.

The Cream Cheek - This Bourjois Cream Blush in 03 is a great spring shade as it is has just the right amount of pink to coral ratio to make it a great transitional colour. The cream formula is makes the whole dewy sunkissed look great and means it applies seamlessly. 

The Powder Blush - MAC Dainty blush is a mineralise finish which means it has a hell'uva lota glitter in it, but it's milled enough to not make it look like you've face planted a vat of glitter. For me spring says pink, and you can't get a prettier pink colour, that truly comes off pink, in a good way!

The Luxury Item- Everybody loves a bit of luxury in their life. This Chanel Blush is the perfect peachy pink colour that blends in well to your skin and gives you that perfect springs day flush. Plus, it's Chanel, beautiful enough just to look at.

What are your spring fling blushes?

Laura xoxo 

Monday 24 March 2014

Review: Maybelline ColorSensational Shine Gloss in Glorious Grapefruit


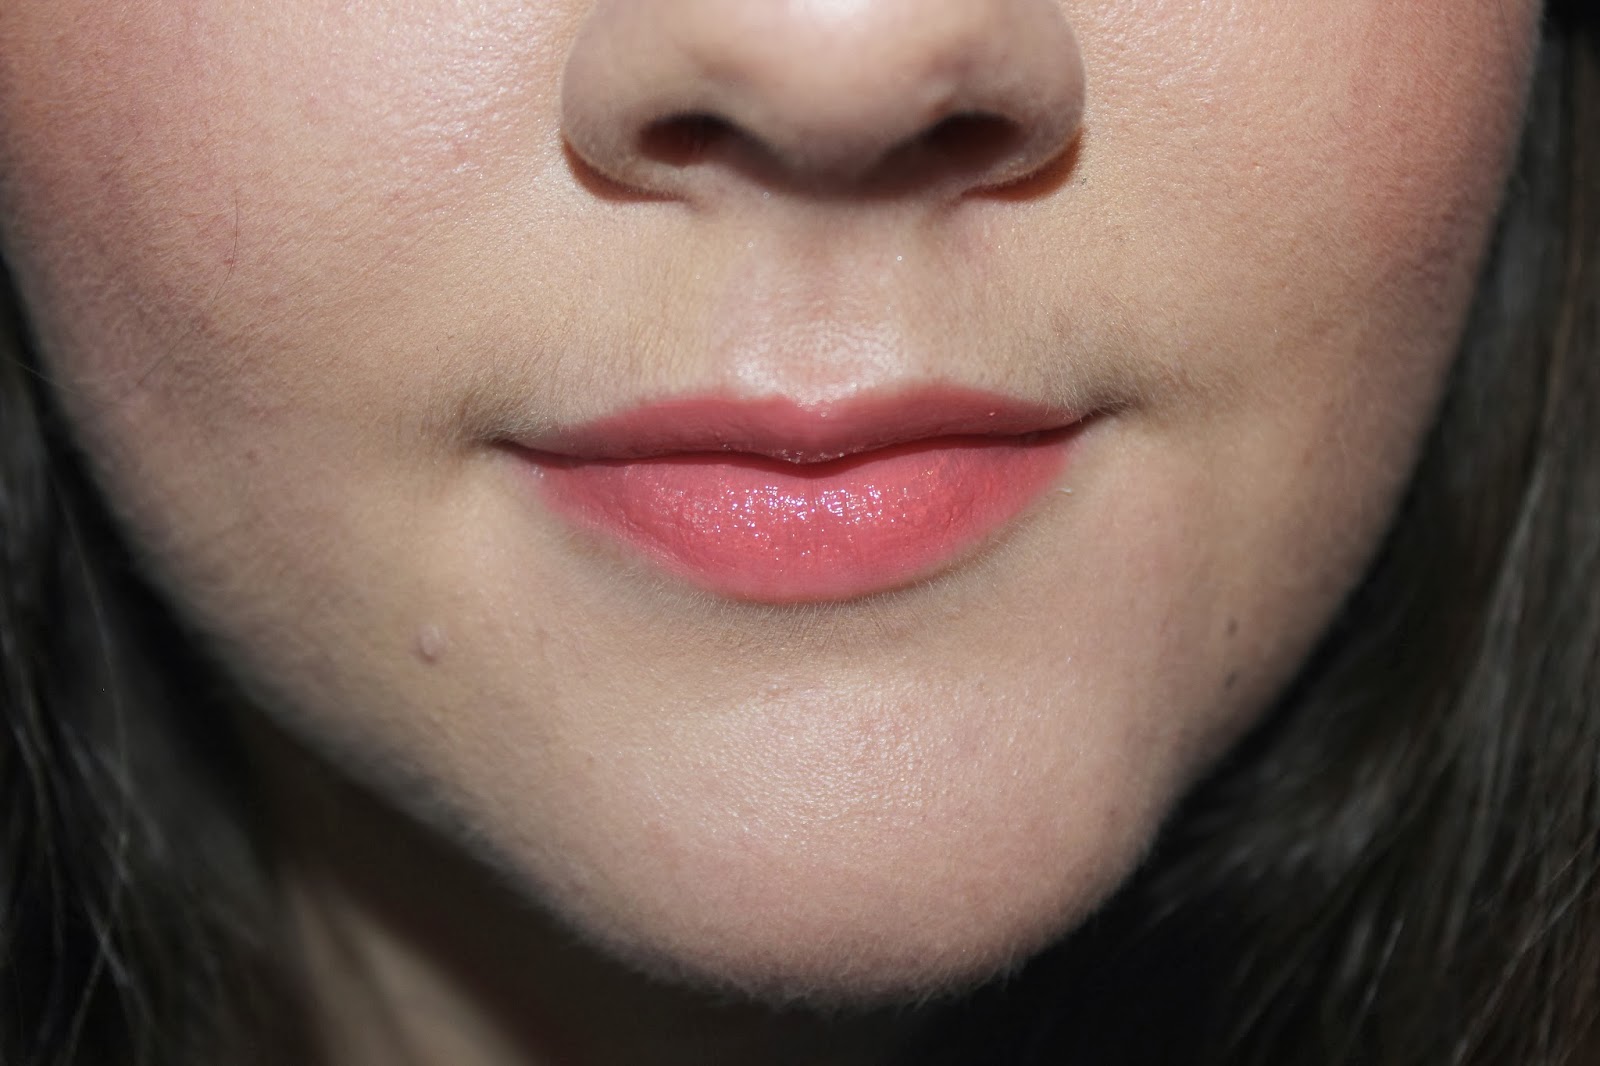
After hearing many a blogger talk about these Maybelline ColorSensational Shine Gloss's and with Boots having their 3 for 2 offer going I thought it was only right I pick one up and give it a shot. A first Cashmere Rose was the one I intended to pick up, but after swatching it in store it felt a bit bleh, so I plumped for Glorious Grapefruit instead.

Whilst it is a definite peachy shade, leaning slightly orange in the tube and in my swatch, on my lips it definitely goes more pink which I like. 

One of the reasons I picked up this product is because it has been likened to the Clarins Instant Light Lip Perfectors which I'm yet to try but stare longingly at whenever I'm near a counter. I do however have the No7 BB Lips which I hold in high regard. In comparison to that product I'd say this is definitely more of a lipgloss than a nourishing product, and I did have a case of hair stuck in lips when wearing this, which I don't usually get with my BB lips

What I like about this product is the pigmentation it has. Whilst it is deemed to be a lipgloss, it definitely has the coverage to be a liquid lipstick, in my opinion. It gives a nice colour without feeling to heavy and thick on the lips. I also love how small the doe foot applicator is and it makes applying it really easy.


I think this is a great your lips but better look, and is something I can see myself reaching for a lot over the coming months. It is the nice finishing touch to a natural make-up look, or for toning down a smokey eye.

I do love me a nude lip afterall.

Have you tried these? What do you think?

Laura xoxo

Sunday 23 March 2014

The Almost Tinted Moisturisers


The amount of categories of base products is pretty amusing really isn't it? We have tinted moisturisers, BB creams, CC creams and whatever is developed next. Today I want to talk about those 'almost tinted moisturisers' or moisturisers with a 'hint of tint' as they like to call themselves.

The Underneath/Mixed in Product - When I first used Soap and Glory's Glow Job I tried to use it as a base straight away, which didn't really work out for me. I've since found that it works best applied underneath a foundation (only a tiny amount needed) or mixed in with a pale foundation.

The Original - Ah, Origins VitaZing the product that begun my craze in the almost tinted moisturiser area. I really love this product, from the application all the way down to the smell. It really evens out my skin tone but my skin still has a natural look to it. The only thing wrong with it is the price, some a not quite tinted moisturiser it is £27, a bit pricy in my opinion.

The One with Skincare Qualities - The most recent addition to my almost tinted moisturiser stash is the Garnier Miracle skin Cream which boast skin care qualities alongside the a skin tint. It is really hydrating as well as giving a good boost of colour to the skin too. Alongside this it also aims to reduce signs of ageing and is only £12.99, score.

What are your favourite almost tinted moisturisers?

Laura xoxo

Friday 21 March 2014

Friday Find: Pinterest


Ok, I admit, I am totally late to the Pinterest party. I originally tried to sign up when you still had to be invited to join. I finally set it all up to see what all the fuss was about, and left a little confused so began to neglect it.

I've always had a bit of a thing for Tumblr. I don't know why, I think it's due to the endless scrolling and re-blogging of anything that takes your fancy without needing to place it in a category. But boy have times changed. I now find myself becoming anxious for re-blogging an image with out placing it on a certain board first. (I lead a very sad life, I'm fully aware.)

My Pinterst addiction began around Christmas. I use Pinterest for work, and after a few months of working on the company one, I began wondering if it was time to work on my own. Enter Christmas and Christmas images and I was hooked. Now I love Christmas, a lot, and Pinterest helped further my love and give me new and exciting ideas for decorations, gifts and most importantly, FOOD.

Now that Christmas has come and gone (sob) I thought Pinterest would lose its charm, but no, my love has stayed firm. I tend to have a good old pinning session right before bed, or peruse the popular page whilst watching the TV.

Are you addicted too? Leave me your boards below!

Laura xoxo

You can follow my boards here: http://www.pinterest.com/callofbeauty/

Wednesday 19 March 2014

In My Eye-Line

Eyeliner is a funny old thing. It is definitely an after thought in my make-up routine, however for some they feel naked with out.

I must admit I had a tiny dabble with the whole deep black liner all round the lids, upper and lower lashline, and for that reason I find myself very apprehensive to place it anywhere near those areas again. However I do love using it to add definition to my upper lashline, so all is not lost. But for my water line I tend to steer clear; but sometimes you just need a little something there.

The Brightener - If ever I want to look more alert or awake then I always reach for my Rimmel Scandaleyes Pencil in Nude. I just love this product so much. It is really pigmented so eradicates any signs of redness whilst also really opening up my eyes and making them looker bigger and more awake.

The 'I need something there' - Sometimes you just need something on your water line to bring a look together. For that I reach for my other Rimmel Scandaleyes Pencil in Taupe. This is great as it isn't necessarily dark, but it isn't brightening either. It's a natural smokey eyes best friend.

The not quite black- Sometimes you need a dark colour to add the drama to your eye make-up and for that I reach for my Loreal Pencil in Grey. It is a lovely grey with a hint of navy to it and is great for adding the dark drama without being a black. It also is great for working into the upper lashline and smudging out too.

The something special - Ahhh, MAC Powersurge eye pencil, if you've read my blog for a while it will come as no surprise that this has made its way to this list. I love this for a nice bronze look to my eye, it really pulls together a bronze eye perfectly, and is definitely a summer staple.

The all over eye pencil- Finally the Rimmel Scandaleyes in Bronze is more of an all over the lid cream eyeshadow stick, however if you like a heavy liner look, the cream formula works great on the lower lash line to add some deep bronze to your look.

Where do you stand on liner?

Laura xoxo

Monday 17 March 2014

Review: Garnier Miracle Skin Cream


So this product is another hopeful Origins VitaZing dupe. I purchased it just a few days after getting the Soap and Glory Glow Job as I wanted to see how the too compared.

Firstly this one contains SPF which the Glow Job didn't, so it already had my attention due to that. Again I first used it in this video, and as you can see I definitely preferred it to the Soap and Glory one.

This products boasts many more skin-care qualities too. It aims to hydrate your skin whilst removing signs of ageing over time. Now I am young, but I don't see any harm in using this product now, prevention is much better than a cure after all.

Hydration-wise it definitely is above and beyond the Soap and Glory offering. As soon as I put it on my face I can feel the hydration sinking in. It also has a nice fresh smell, which I tend to associate with Garnier products. I will say that it doesn't last 24 hours, especially in these cooler months. Some times in the after it does start to rub off my skin due to dryness, and I would say I have slightly oily skin; something to consider if you have a dry complexion.

Pigmentation wise, it can look a little orange at first, but does blend out well and is definitely a fierce contender for my loved Origins VitaZing.


This is me with this moisturiser, some concealer and a bit of powder on.

Overall I'm really happy with this product and would most likely buy it again.

What do you think? Have you tried it?

Laura xoxo

Saturday 15 March 2014

Let's Talk Lips


A used to be an eyeshadow girl, then a blush girl, and lately I'm all about lips. I can't get enough of all the different formula's, colours and brands. I think the lipstick you choose to wear definitely changes the whole look of you make-up, so it's an important step.

The comfort one: When I'm in a rush, or just want something comfortable to wear I always reach for my No7 BB Lips. The formula is glossy without being sticky and is nice and moisturising on the lips. It also contains SPF too which makes it perfect for summer (shall it ever arrive!)

The Tube Stick: Crayon style lipsticks are definitely a trend that isn't dying down. I'm glad about that as I think they're really handy (as long as they're twist top rather than sharpen!) Of all the ones I've tried I must say the Bourjois Colour Booster's are my favourites. Perfect pigmentation, feels nice and the lips and the longest lasting too.

The Moisturising one: As far as moisturising formula's go, the Moisture Renew Range by Rimmel are my favourite. The have the proper pigmentation of a lipstick (unlike the BB lips) but the comforting factor of a moisturising lipstick too. Perfect if your lips are a little dry from the winter.

The Liquid Lacquer: Liquid lipsticks are a trend that intrigued me. I'm yet to try a YSL glossy stain, but I've admired from a far. To save my bank balance I picked up the Rimmel Appocalips (in a number of colours I may add) and I can see why people like the liquid lip. Pigmentation is incredible, shine is gorgeous and the longevity is pretty spectacular. My only gripe is the fact it can get on your teeth a little. I find using the back of the applicator a great way to give the right amount of product.

The Luxurious Buy: Every time I get enough points on my Boots card I go straight to Dior and Chanel and peruse their lipstick selection, picking up and putting down multiple colours and formula's and leave empty handed. I just can't do it. Then Christmas came and bought along with it the Feel Unique Sale. I had a £20 voucher and the YSL Rouge Voluptee was in the sale for that price so I picked one up. Every thing about it screams luxury, from the packaging to the finish. Now I just need to decide on my next colour...

What are your favourite lipsticks?

Laura xoxo

Friday 14 March 2014

Friday Find: Shameless Fripperies


Whilst watching a YouTube video the other week I saw a link to a Get Ready with Me underneath by someone whose channel I'd never seen before and decided to give it a watch. (I loves me a good GRWM!) 

The channel in question was Karmia McKimmie's and my gosh was I glad I gave it a click. Not only did I watch the GRWM I also headed back through her archive and gave a fair few of her videos a watch. 

I found Karmia to be extremly funny, really light hearted and super clued up on her beauty boomf. Think Lisa Eldridge style videos guys and girls, but just a bit younger with a few more jokes cracked. 

So if your haven't already subscribed to her, make sure you do so here!

She also has a website you can view here.

Have you seen any of Karmia's videos?

Laura xoxo


Thursday 13 March 2014

Throwback Thursday: One Tree Hill


Ah, One Tree Hill! I loved this show so much, and was kind of gutted when it ended. I think it's just such a good show, and one of the only ones that actually succeeded once the characters left high school (*cough Gossip Girl cough*).

When my manager at work mentioned she was re-watching them it made me want to re-watch them too, and she kindly lent them to me. I've just finished the second series and I'm now beginning the third. Boy a lot has happened, and I think 3 has some of my favourite episodes.

I forgot just how good this show was, and love that there are bits I've forgotten so it's a bit like watching a new show, but I also have things I'm excited to happen.

There is something theruptic about re-watching shows for me and I think there's nothing better after a long day than coming home and watching some good TV that you know you're going to love.

What shows you do want to re-watch?

Laura xoxo

Monday 10 March 2014

Review: Soap & Glory Glow Job


Whilst I do love a good scrub or body wash, Soap and Glory make-up has never really called to me for some reason. One weekend I was reading a post by Vivianna Does Makeup (which I'm usually doing to be fair,) and saw her mention this product. From the description she gave it sounded a little like the Origins Vita-zing moisturiser so I decided to pick it up, as I'm always looking for a cheaper alternative. 

The Soap and Glory Glow Job describes itself as a 'sunkissed tinted morning moisture flash'. Basically it's a moisturiser with a bronze tint to it.

When testing it out on my hand I noticed that the pigments in it where quite orange, but after a bit of blending seemed to smooth themselves out.


You can see my first impressions and application of this product in this video as this was the first time I'd used it on my face. Oh boy, did it not really go right. As I said in the video I definitely looked like I'd escaped from Wonka's chocolate factory, it was not good.

I have tried it since and definitely believe that less is more. The second time I used it underneath a foundation and think that it's definitely the way forward with this product.

If you're lucky enough to have foundations too light for you, or once summer approaches want to add a bit of tanned glow to your skin I definitely suggest giving this a go, but in the winter on your face, I'm going to have to give it a miss.

Have you tried this? What did you think?

Laura xoxo

Sunday 9 March 2014

Manicure Must Haves


I love having freshly painted nails, however hate it when they start to chip after a few days. It got to the point where I just decided I couldn't be bothered with the up-keep and stopped painting them all together. But then I found some pretty awesome items that help keep my main fresh for a good 5-7 days, score! So today I'm sharing them with you.

Mavala Oil Seal Dryer - One of the most annoying things when painting your nails is the waiting time after. The number of times I've thought my nails were dry then ruined them is ridiculous. I did have a long standing relationship with the Sally Hansen Insta-Dry but it got to the point where that wasn't even cutting it for me so I decided to try this one, and boy am I glad I did. It dries my nails in seconds, and as it's an oil is really nourishing too.

Orly Bonder Top Coat - I would marry this little bottle if I could. The difference it's made to my nail lasting days is amazing. I honestly believe this is the reason my polish lasts for as long as it does. I can't sing its praises enough. I think everyone should try it.

Maybelline Super Stay 7 Days Colour in Clear - For me this top coat is the best I've tried. It gives a nice gel-like finish to the nails which I'm fond of and does help nail polish stay in place. It's not as good at keeping polish in place without Orly, but the finish is something I love.

Sally Hansen Instant Cuticle Remover - I find it quite soothing to push back my cutilces each time I paint my nails and I think it's great at giving me a good canvas to paint as my nail beds are quite small. You simply pop this on your cuticles and after 15 seconds they've dissolved and easy to push back.

What're your manicure must haves?

Laura xoxo

Friday 7 March 2014

Friday Focus: Origins


If I could only use one skin care brand I would have to choose Origins. There is just something about the brand that I, and my skin, loves. Whilst it certainly isn't cheap and cheerful it doesn't break the bank either. I was going to do a 'top five products' post but I just love too darn many of them. There are a lot more products from the brand I've tried and liked, but these are the ones that I wouldn't want to be without for too long.

Drink Up Intensive Overnight Mask - A mask most bloggers have tried or at least heard of. The aim of this mask is to moisturise your skin overnight, leaving you with plump and soft skin come the morning. Whilst I do love using this overnight when my skin is feeling particularly parched, I also love using it in the day over winter as it keeps my skin more hydrated than any moisturiser does.

Make A Difference Rejuvenating Cleansing Milk - This was a whim purchase but one I will continue to make. This is a great all round cleanser, I like to use it in the morning when I want more moisture in my skin, or in the evening for a gentle second cleanse. It isn't harsh on the skin but it also isn't too heavy to create spots either.

Clean Energy Cleansing Oil - I love using this whenever I'm wearing make-up as I feel it really removes every last scrap of it. I just pour it into my hands (definitely getting a pump next time as it can get messy) massage it on my face (which feels ah-mazing) and then wash it away. It comes off clean and doesn't leave my face feeling greasy.

VitaZing - Ah, the not quite tinted moisturiser that people seem to either love or hate. I began in the hate category but now stand firmly in the love. I think it's a great I'm going out in public, but don't want to make an effort product. This and a bit of concealer and you're away to go. For me it's more of a summer product as it does lean a bit orange in the winter, but one I love using. I also find it great to wear under foundation if my skin is going through a rough patch.

Make A Difference Plus + Rejuvenating Treatment - The latest and probably one of my favourite products, this treatment injects moisture whilst also clearing up blemishes at the same time. For someone with dehydrated but blemish prone skin this product has done wonders for my skin. I can't pin-point exactly how it works or what it does but I never want to be without it. It is one of those products you can really see making a difference to your skin.

High Potency Night-A-Mins - This is hands down the best night time moisturiser I have ever used. It has fruit extracts that aim to exfoliate your skin whilst you sleep, however it also has a thickness to it that hydrates your skin too. I find that I wake up with clearer and plumper looking skin. What more could you want?


Dr Weil for Origins Mega-Mushroom Skin Relief - I like using this as my 'hydrating' toner as it has a real soothing quality to it. It soothes angry blemishes and leaves my skin feeling soft to touch. I also found this was really helpful when my skin had a reaction to a product I was using. (Although it's not pictured as I ran out and couldn't get a replacement before this post, I still wanted to include as I really rate it as a product.)


Have you tried Origins? What are your favourite products?

Laura xoxo

Wednesday 5 March 2014

How to Extend your Reading List


Sometimes it's easy to find yourself getting stuck in a bit of a rut, both in life and in the blogging world. I for one fall into ruts on many occasions. It's always the same I have a good handful of unread blog posts in my bloglovin' yet I still find myself wanting a new blog to read. To me, a good blog is the same as a good book, I want to find one and get lost in it. I know I've found a good blog when I find myself scrolling through it's archive. The same goes for videos too, I can have plenty in my watch-later folder and still want someone new to watch. The idea for this very post came whilst I was hunting for something new to get lost in and thought I'd share some of my tips (if you can call them that!) with you.

1) Search Key Words - whether it be in Google, bloglovin' or YouTube type in key word you're looking for and scroll through the results. I love watching Get Ready with Me videos so type that into YouTube to see what videos there are out there. If you like a certain type of blog post search for that too, or even just search 'beauty blogs' to see what's out there.

2) Scroll Through People's Blog Rolls - Many bloggers tend to keep a blog roll full of their favourite reads. If you search through a blogger you really enjoys blog roll you're more often than not likely to find some more blogs that you'll like too.

3) Take Advantage of 'Popular Posts' and 'Top Videos' Sections on Social Media Sites - Bloglovin is great at showcasing what is popular right now, as is YouTube, take some time to scroll through and you may find some new favourites. I also really like bloglovin's 'up and coming' feature.

4) Look at Recommended Twitter Suggestions - You know those people you see on the side of your Twitter feed where they suggest people you might know? Well if you follow a lot of bloggers on Twitter it's pretty likely those people will be bloggers too. Have a scroll through their tweets, see if you like their personality, then go take a peek at their blog.

5) See What Others Are Liking on Instagram - I'm always looking for new people to follow on Instagram (I love looking at pretty pictures) and find seeing what other people are liking through the 'News' section. Nine times out of ten the person is a blogger of some sort (I follow a lot of bloggers) so if I like their insta-snaps I'm pretty sure I'll like their blog too.

Finding new blogs not only is a great way to use your free time but I find it also inspires me in my own blogging as it opens my eyes to new features and image layouts.

How do you like to find new reading material? Who are your favourite bloggers/vloggers?

Laura xoxo 

Monday 3 March 2014

Review: Orly Bonder Top Coat


I love having painted nails, theres just something about it that makes me happy and feel better about myself. However I hate having chipped nails, which usually occurs after two days of wearing nail varnish and I don't have the time or patience to keep on top of my nail painting, so for a while I stopeed painting my nails altogether.

Then a couple of weeks back I was watching a video my MissGlamorazzi and she mentioned this Orly Bonder Top Coat and I became a woman possessed trying to track it down to test it out.

I painted my nails on a Tuesday evening and the picture above is the following Sunday. Pretty impressive considering I'm constantly washing up at work and had done some tidying. I hadn't noticed anything wrong with it until the Saturday either. Plus, this is a No7 nail polish which doesn't last long on me anyway.

Overall I'm really impressed with this basecoat, my only issue is the size of the bottle. Smaller than my little finger I think it could be bigger, however for a fiver I can't grumble too much. Also hopefully I'll be able to use the whole bottle before it goes gloopy.

Have you tried this? What do you think?

Laura xoxo

Saturday 1 March 2014

Saturday Sweet Tooth: Rock Buns

When I was younger, on the weekends I was at my dad's and he wanted some peace and quiet to watch the football (snooze) he had to think of things I could do get me out of the way. Baking was one of those things; something that benefited both of our stomachs. 

Rock buns were something that we both enjoyed, and his then girlfriend's mom used to make them too and gave me the recipie. To this day it is one of the few recipes I remember off by heart, and still love making and today I'm sharing it with you.


You will need:

- 8oz Self Raising Flour
- 4oz Butter
- 2oz Sugar
- 1 Egg
- Sultanas/Raisins
- Splash of milk


In a bowl add all of the dry ingredients (minus the sultanas.) Use your fingers to mush it all up to create fine breadcrumbs.


It should look a little something like this.


Then add your egg and sultanas and stir until a dough is formed. If it still looks a little dry, add a splash of milk until it's all combined.


Take your dough and make little balls. The size can be however big or small you like. (Massive ones are amazing, FYI!) Place them on a greased baking tray and pop them in the oven.


Pop them in the oven, I put mine at 180oc for 12mins. Temp will vary depending on oven type, and time will depend on the size of your balls (oo-er!)


Once they're looking golden and delectable get them out of the oven and leave them to cool. Whilst it is tempting (and blooming well hard) you must leave them to cool down, otherwise they'll just be buns and not rock buns.


Here's the finished article. You can totally experiment with the recipie. I find that a teaspoon of mixed spice and some glace cherries go really well. We did try to make chocolate ones once but the didn't really work out.

What are your childhood baking stories? I'd love to know.

Laura xoxo